

Air fryers have become a must-have kitchen appliance because they cook quickly, use less oil, and make crispy food with minimal effort. But like any appliance, an air fryer needs proper cleaning to stay hygienic and work efficiently. Grease, crumbs, and food residue can build up inside the basket, heating element, and tray, causing odors, smoke, and even affecting the taste of your food.
In this guide, you’ll learn exactly how to clean an air fryer step-by-step, how often to clean it, mistakes to avoid, and the best tips to keep your air fryer smelling fresh and performing like new.
Why Cleaning Your Air Fryer Is Important
Cleaning an air fryer is more than just keeping it looking good. It directly affects performance, safety, and food quality.
If you don’t clean your air fryer:
-
Grease buildup can cause burning or smoking during cooking
-
Bacteria can grow on leftover food particles
-
The appliance may produce bad odors
-
The fan and heating element may clog
-
Food may taste burnt or stale
-
The lifespan of your air fryer can shorten
Regular cleaning prevents these problems and keeps your appliance functioning efficiently.
What You Need to Clean an Air Fryer
Gather these simple cleaning items before starting:
-
Warm water
-
Dishwashing liquid
-
Soft sponge or microfiber cloth
-
Soft brush or old toothbrush
-
Paper towels
-
Non-abrasive scrub pad
-
Baking soda (optional for stubborn grease)
Avoid anything abrasive, such as metal scrubbers, as they can damage the non-stick coating.
How to Clean an Air Fryer: Step-by-Step Guide
Step 1: Unplug the Air Fryer
Always ensure the air fryer is unplugged and cool before cleaning. Cleaning while hot can damage the non-stick coating and be dangerous.
Step 2: Remove the Basket and Tray
Take out the basket, pan, and any removable components. These are usually the parts that collect the most grease and food residue.
Step 3: Soak Components in Warm Soapy Water
Fill your sink with warm water and dishwashing liquid. Let the basket and tray soak for 10–15 minutes to loosen grease and crumbs.
If the grease is stubborn, add 1 tablespoon of baking soda to the water.
Step 4: Scrub Gently
Use a soft sponge or brush to scrub away residue. Pay attention to the corners and mesh areas where grease often hides.
Avoid metal scrubbers — they can scratch the non-stick coating.
Step 5: Rinse and Dry
Rinse each piece with warm water and dry them with a towel or allow them to air dry completely.
Step 6: Clean the Inside of the Air Fryer
Use a damp cloth or sponge to wipe the interior walls. Avoid soaking the inside since the electrical components cannot get wet.
For stubborn spots inside the air fryer:
-
Make a paste of baking soda and water
-
Apply it gently to the dirty area
-
Wipe clean with a damp cloth
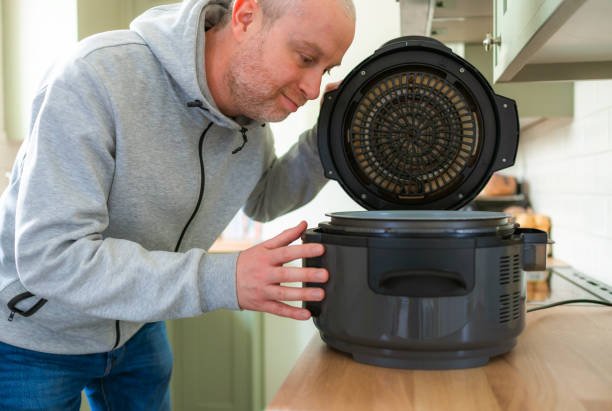
Step 7: Clean the Heating Element
Turn the air fryer upside down.
Use a soft brush or sponge to clean the heating element carefully.
If there is hardened grease:
-
Use a damp cloth with a little dish soap
-
Gently wipe without applying too much pressure
Step 8: Wipe the Exterior
Use a damp cloth to wipe the outside of the air fryer. This removes fingerprints, dust, and oil splashes.
Step 9: Reassemble the Air Fryer
Once everything is completely dry, put the basket and tray back inside and plug the air fryer in.
Your air fryer is now clean, fresh, and ready for use!
How Often Should You Clean an Air Fryer?
The ideal cleaning schedule depends on how often you use it:
-
After every use: Wipe the basket, tray, and interior lightly
-
Weekly: Full cleaning of basket, tray, and interior
-
Monthly: Deep clean including heating element
Regular cleaning prevents buildup and makes deep cleaning much easier.
Deep Cleaning Tips for Stubborn Grease
If your air fryer has heavy grease buildup, try these expert tricks:
-
Baking soda paste – Mix with water and scrub gently
-
Vinegar steam clean – Heat a small bowl of water and vinegar inside for 3 minutes, then wipe down
-
Overnight soak – Works well for burnt-on crumbs
-
Soft brush cleaning – Helps clean mesh areas without damaging coating
Avoid oven cleaners and harsh chemicals. These can ruin non-stick surfaces.
Common Mistakes to Avoid
Many air fryer owners accidentally damage their appliance while cleaning. Avoid these mistakes:
-
Using metal scrubbers
-
Submerging the entire air fryer in water
-
Not unplugging before cleaning
-
Using harsh chemicals
-
Cleaning while the air fryer is hot
-
Forgetting to clean the heating element
-
Putting non-removable parts in the dishwasher
Avoiding these will help your air fryer last longer and stay safe to use.
How Long Does It Take to Clean an Air Fryer?
Depending on the dirt level:
-
Light cleaning: 5–7 minutes
-
Regular cleaning: 10–15 minutes
-
Deep cleaning: 20–30 minutes
If you clean after each use, heavy deep cleaning becomes rare.
FAQs
1. Can I put my air fryer basket in the dishwasher?
Most removable baskets and trays are dishwasher-safe, but always check the manufacturer’s instructions.
2. Why does my air fryer smell bad even after cleaning?
Grease may be stuck on the heating element or inside walls. Do a deep clean with baking soda or vinegar steam.
3. Can I use vinegar to clean an air fryer?
Yes, a mixture of vinegar and water is excellent for deodorizing and removing grease.
4. What should I do if grease is burned on?
Use a baking soda paste or soak the parts longer in warm soapy water.
5. Is it safe to use oven cleaner?
No. Oven cleaners can damage the non-stick coating and leave chemical residue.
6. How do I clean the fan area?
Turn the air fryer upside down and gently brush the heating area. Do not pour water inside.
7. Do air fryers need deep cleaning often?
Only when there is grease buildup. Regular quick cleaning prevents the need for heavy scrubbing.
Conclusion
Cleaning an air fryer is simple and doesn’t take much time — especially when done regularly. By soaking removable parts, wiping down the inside, and cleaning the heating element carefully, you can keep your air fryer looking new and working efficiently. Regular cleaning prevents odors, improves cooking results, and ensures your appliance lasts longer.
With proper care, your air fryer will remain a safe, hygienic, and reliable part of your kitchen for years to come.