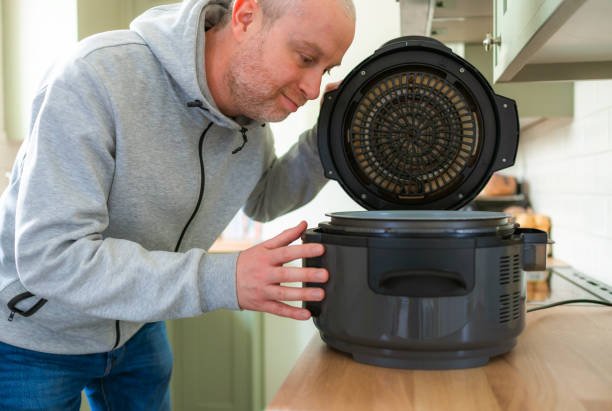


A rangehood is one of the most important kitchen appliances, keeping smoke, grease, and cooking odors out of your home. Over time, the filter inside your rangehood can become clogged with grease, dust, and food particles. A dirty filter not only reduces airflow but can also create unpleasant smells and even pose a fire risk.
Cleaning your rangehood filter regularly is essential to keep it working efficiently and maintain a hygienic kitchen. In this guide, we’ll show you step-by-step how to clean your rangehood filter, including tips for different types of filters, maintenance advice, and expert hacks to make the job quick and easy.
Why Regular Filter Cleaning Matters
Rangehood filters trap grease, smoke, and food debris before it spreads across your kitchen. When filters are neglected:
-
Airflow decreases, making your rangehood less effective
-
Grease buildup can lead to unpleasant odors
-
The motor works harder, shortening the appliance’s lifespan
-
Fire hazards can increase in extreme cases
By cleaning your filter regularly, you keep your kitchen fresh, improve air quality, and ensure your rangehood functions efficiently for years.
Types of Rangehood Filters
Knowing your filter type is important because each requires a slightly different cleaning method.
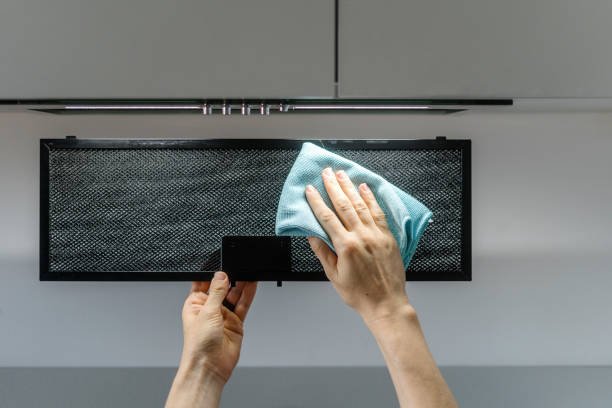
1. Metal Mesh Filters
-
Made from aluminum or stainless steel
-
Capture grease and fine particles effectively
-
Can be soaked and washed in warm soapy water
2. Baffle Filters
-
Feature angled plates that trap grease efficiently
-
Common in professional-style kitchens
-
Can also be cleaned in a sink or dishwasher
3. Charcoal or Carbon Filters
-
Absorb cooking odors rather than grease
-
Cannot be washed
-
Must be replaced every 3–6 months
Tip: Always check your manufacturer’s instructions before cleaning or replacing filters to avoid damage.
Tools and Materials You’ll Need
Before you start, gather the following items to make the process smooth and efficient:
-
Dishwashing gloves
-
Hot water
-
Dishwashing liquid or kitchen degreaser
-
Baking soda for tough grease
-
Soft brush or sponge
-
Large basin or sink
-
Clean towels for drying
Having everything ready beforehand saves time and prevents frustration.
Step-by-Step Guide to Clean Your Rangehood Filter
Step 1: Remove the Filter Carefully
Turn off your rangehood and unplug it if possible. Open the filter compartment and gently remove the filter. Some filters have clips or tabs, so check the manual if you’re unsure how to remove it.
Step 2: Soak in Hot Soapy Water
Fill a large basin or sink with hot water. Add dishwashing liquid or a degreaser, and for stubborn grease, mix in 2–3 tablespoons of baking soda. Submerge the filter completely and let it soak for 15–30 minutes. This loosens grease and food residue, making scrubbing easier.
Step 3: Scrub Thoroughly
Use a soft brush, sponge, or old toothbrush to clean every corner. Pay attention to folds and edges where grease tends to accumulate. Avoid abrasive brushes to prevent scratches on metal surfaces.
Step 4: Rinse and Inspect
Rinse the filter under warm running water until all soap and residue are gone. Shake off excess water and check for any remaining grease. Repeat soaking and scrubbing if necessary.
Step 5: Dry Completely
Pat the filter dry with a towel or let it air dry. Installing a wet filter can damage the motor or encourage mold growth.
Step 6: Reinstall the Filter
Place the clean, dry filter back in the rangehood. Make sure it’s secure and the clips or tabs are properly fastened. Turn on the rangehood to ensure airflow is restored.
Tips to Keep Your Filter Cleaner for Longer
-
Clean the filter once a month for frequent cooks; every 2–3 months if you cook occasionally
-
Wipe the exterior of your rangehood regularly to prevent grease buildup
-
Use lids on pans when frying or sautéing to reduce airborne grease
-
Avoid harsh chemicals; mild dish soap or degreaser works best
-
For charcoal filters, follow the manufacturer’s replacement schedule
These small habits can significantly reduce cleaning time and keep your kitchen smelling fresh.
Common Mistakes to Avoid
-
Forgetting to unplug the rangehood before cleaning
-
Using abrasive brushes that scratch the filter
-
Skipping regular maintenance, leading to heavy grease buildup
-
Reinstalling a wet filter, which can damage the motor
-
Using harsh chemicals that aren’t recommended by the manufacturer
Avoiding these mistakes ensures your filter stays in great condition and your kitchen remains safe.
How Long Does It Take to Clean a Rangehood Filter?
The cleaning time depends on the type of filter and how dirty it is:
-
Metal mesh or baffle filters: 20–30 minutes, including soaking and scrubbing
-
Heavily soiled filters: 30–45 minutes
-
Charcoal filters: 5 minutes for replacement only
Cleaning your filter regularly reduces time and prevents buildup, making maintenance much easier.
FAQs
1. How often should I clean my rangehood filter?
Monthly for frequent cooking, every 2–3 months for occasional cooking. Replace charcoal filters every 3–6 months.
2. Can I clean the filter in the dishwasher?
Some metal and baffle filters are dishwasher safe. Always check manufacturer instructions first.
3. What do I do if the grease is stubborn?
Soak the filter longer in hot water with dish soap and baking soda, then scrub gently with a soft brush.
4. Can I use bleach?
No, bleach can damage metal filters. Stick to mild detergents or degreasers.
5. Do charcoal filters get cleaned?
No, they cannot be washed. Replace them as recommended.
6. How can I prevent the filter from getting too dirty?
Wipe your rangehood regularly, use lids on pans, and clean spills immediately.
7. Can a dirty filter cause smoke in the kitchen?
Yes. Reduced airflow can cause smoke, odors, and even increase fire risk if grease accumulates.
Conclusion
A clean rangehood filter is essential for a safe, hygienic, and fresh kitchen. Regular maintenance keeps your rangehood working efficiently, prevents smoke and odors, and extends the life of the appliance. By following these simple steps and cleaning the filter monthly, you’ll maintain optimal airflow, reduce grease buildup, and enjoy a cleaner, healthier kitchen environment.
Cleaning your filter doesn’t have to be a chore — with the right tools, simple techniques, and consistent habits, it can be a quick and easy part of your kitchen routine.