


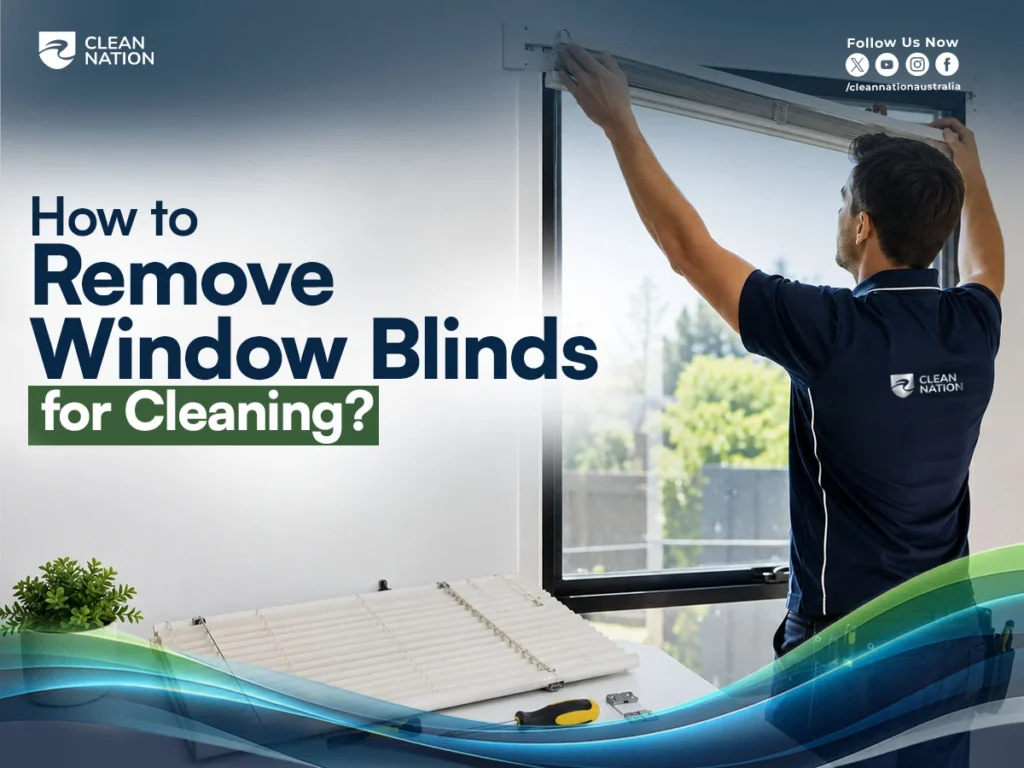
How to remove window blinds for cleaning: Fully raise or lower the blind, identify the bracket type, release the locking mechanism, and slide the headrail out of the brackets. If needed, remove the mounting brackets, clean the blinds, let them dry completely, then reinstall everything in reverse order and check that the blind operates smoothly.
Why Remove Blinds Before Window Cleaning?
Blinds trap dust and grime right up against your window, so cleaning around them never gets the glass fully clean. Taking them down first is the only way to do the job properly.
It’s also a chance to check for damaged components, wipe down the fabric or slats, and stop dust and mould building up over time. Basic blind maintenance like this keeps them working smoothly and looking good for longer.
Some people go a step further and use this time to update window cleaning treatment altogether, since it’s much easier to swap out blinds when they’re already off the wall.
If you’d rather skip the hassle, Clean Nation handles the removal, cleaning, and reinstallation for you, start to finish.
Types of Window Blinds and How They Affect Removal?

Every blind type, roller, Venetian, vertical, Roman, cellular, or motorised, comes off differently. Knowing which one you have makes removal faster and a lot less stressful.
Before you start, take a minute to determine the type of blinds you’re working with and identify your bracket style. It saves guesswork later, especially if you’re planning to switch to custom blinds down the track.
Roller Blinds
The roller mechanism and bottom rail make these fairly simple. Just check if yours is spring-loaded or chain-operated, and make sure it’s fully rolled up before releasing it from the brackets.
Venetian Blinds
Detach the pelmet, flick open the bracket flap, and lift the blind slats out of the headrail. Watch the pull string and tilt strings so they don’t tangle.
Vertical Blinds
These sit on a blind track rather than a single bracket. Release the safety latch or press the bracket tabs, then lift the panes free.
Roman Blinds
Held up by a timber headrail with cords running through it. Release the lock-off bracket or right-angle brackets gently to avoid damaging the fabric or cords.
Cellular (Honeycomb) Blinds
Simple mounting hardware and a release mechanism make these easy. Once you lift the blind out of its clips, the rest comes away on its own.
Motorised Blinds
Always disconnect the power and unplug the motor first. After that, removal works much like a standard roller blind.
If sorting brackets and safety latches isn’t your idea of a fun afternoon, Clean Nation can take care of the whole removal process for you.
Tools You’ll Need
You don’t need anything fancy to remove blinds, just a few basic tools most homes already have. Having them ready before you start makes the whole job quicker.
A flathead screwdriver and Phillips screwdriver cover most bracket types, since some use flat-head screws and others use cross-head. A step ladder is a must if your blinds are mounted high; don’t try balancing on a chair or stool instead. Keep a drill handy too, in case any screws are stubborn or you need to remove wall plugs afterwards.
A pair of gloves is worth wearing, especially with older blinds that might have dust, sharp edges, or flaking paint on the brackets. Pliers come in useful for gripping small pins or stuck clips, and a hammer can help if you need to gently tap out a stubborn bracket or wall plug.
Finally, grab a small container or zip bag to keep all your screws and brackets together. It sounds like a small thing, but it saves a lot of frustration when it’s time to put the blinds back up.
If gathering tools and doing this yourself sounds like more hassle than it’s worth, Clean Nation can take care of the entire removal for you, tools included.
Safety Tips Before You Start
A few basic safety precautions for blind removal can save you from a fall or a damaged wall. Set up properly before you touch a single screw.
Use a stable step ladder on a flat surface, not a chair or stool, and avoid overreaching. If a bracket’s out of comfortable reach, move the ladder instead. Clear the work area first, too; furniture and clutter underfoot are easy tripping hazards when you’re climbing up and down.
Lay down a sheet or towel to protect walls and floors from scratches. And if your blinds have a child safety latch or other child safety devices fitted, note how they release before taking them off; they’re worth keeping aside rather than binning.
If you’d rather skip the ladder altogether, Clean Nation can handle the removal safely, start to finish.
Step-by-Step: How to Remove Blinds?
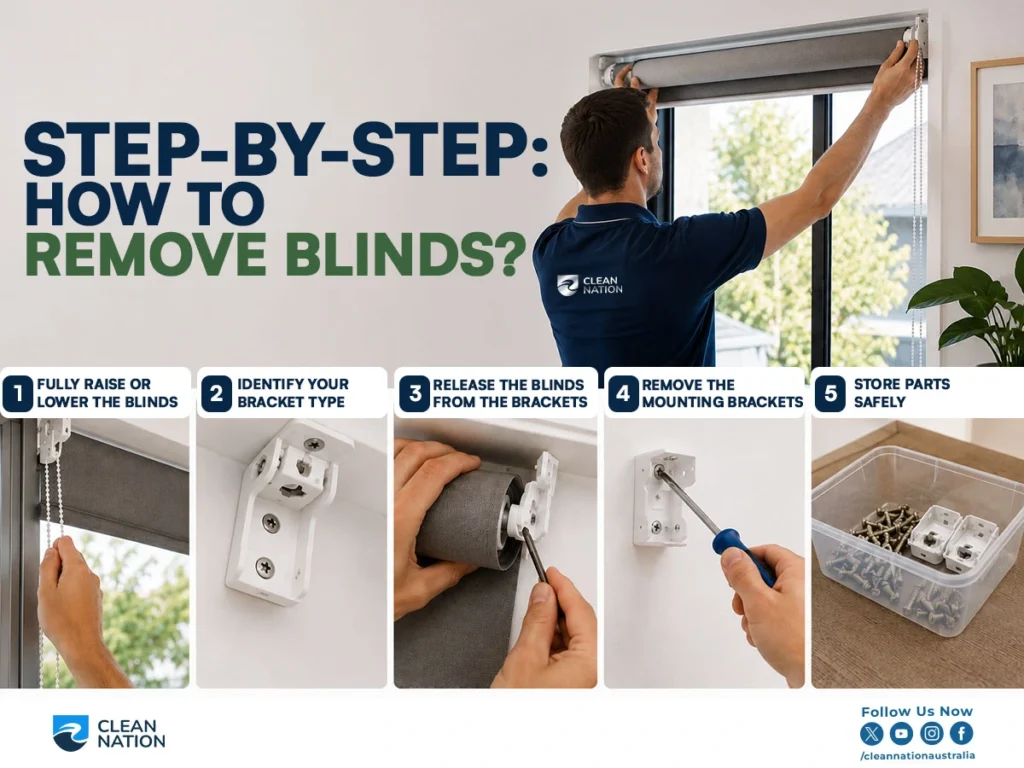
Removing blinds comes down to four simple steps: raise or lower them fully, find your bracket type, release the blind, then take off the brackets if needed. Here’s how each step works.
Step 1: Fully Raise or Lower the Blinds
Start by rolling the blind all the way up, or lowering it fully, depending on the type. Use the chain to roll up roller blinds until fully rolled up, or pull the blind up and lock it in place. This makes it much easier to handle in the next steps; a half-rolled blind is awkward and more likely to slip.
Step 2: Identify Your Bracket Type
Take a second to identify the bracket type before removing anything. Most blinds use either a hook-type bracket or a slot-type bracket. Check both the chain side bracket and the pin side bracket, too, since some models use an inserted bracket on one side. Knowing your bracket style now saves fiddling later.
Step 3: Release the Blinds from the Brackets
Now release the blind. For chain-operated models, gently disengage the chain mechanism. For pin-style brackets, retract the pin using a flat screwdriver, then unhook the blind and slide it out. Some brackets need you to flick open the bracket or rotate the swivel plate first. Pull the blind away slowly; don’t yank it.
Step 4: Remove the Mounting Brackets (If Needed)
If you’re cleaning the wall or switching blinds, remove the mounting brackets too. Support the bracket with one hand while you unscrew it or remove the screws with the other, so it doesn’t drop and mark the wall. You may need to remove side brackets, the centre bracket, or wall plugs and nails if you’re patching the wall afterwards.
If this sounds like more than you want to handle, Clean Nation can remove your blinds safely, no screwdriver required on your end.
Common Mistakes to Avoid When Removing Blinds
A few common blind removal mistakes can turn a simple job into an expensive one. Here’s what to watch out for:
- Forcing the blind If a bracket feels stuck, stop and check what’s holding it instead of pulling harder. This is one of the most common roller blind removal mistakes and often leads to a damaged blind.
- Bent brackets are usually caused by forcing or prying instead of properly releasing the mechanism first.
- Stripped screw holes come from overtightening screws or using the wrong screwdriver size when reinstalling.
- Cracked architraves happen when someone tries to lever a bracket off with a flathead screwdriver instead of unscrewing it properly.
- Wall damage: The main way to remove blinds without damaging the wall is to support the bracket as you unscrew it, rather than letting it hang and pull.
- Rushing the job. Most homeowner blind removal mistakes come down to trying to get it done too fast instead of taking it step by step.
These are all easy mistakes to avoid once you know what to look for. If you’d rather not risk it, Clean Nation removes blinds carefully and correctly the first time.
How to Clean Blinds After Removing Them?
Vacuum off the loose dust first, then wipe down with a damp cloth. That covers most of the cleaning job in two simple steps.
Start with vacuuming; a soft brush attachment lifts dust and cobwebs off roller and Venetian blinds without any scrubbing. Once that’s done, go over them with a damp cloth for everyday dirt.
For tougher marks, wet wipes or a spray and wipe cleaner work well on plastic or aluminium slats. Windex is another good option for Venetian or vertical blinds; it cuts through grime without streaking. Just go easy on fabric blinds like Roman blinds; a light wipe is all they need.
If you spot any mould, usually near a bathroom or kitchen window, deal with it straight away using a mould-specific cleaner. Leaving it can cause staining or a musty smell.
Let your clean roller blinds dry fully before putting them back up.
If window cleaning blinds isn’t how you want to spend your afternoon, Clean Nation can handle the whole process for you, including removal, cleaning, and reinstallation.
How to Dry Blinds Before Reinstalling?
Lay your blinds flat and let them air dry completely before putting them back up. Rushing this step is the easiest way to end up with mould or water marks later.
Find a spot with good daylight and airflow, then lay the blind on a towel or drop sheet over a flat surface. This stops fabric blinds from creasing while they dry, and putting something down first helps protect floors from drips.
Short on space? Hanging the blind over a windowsill or railing outside works too, as long as it’s not exposed to rain. Just make sure every part is fully dry, especially around brackets, hems, and folds where moisture tends to hide. This is key to preventing water damage down the line.
Reinstalling a damp blind can lead to mould or a musty smell, so it’s worth the wait.
If you’d rather skip the drying and reinstallation altogether, Clean Nation handles the whole process for you.
How to Reinstall Your Blinds?

Reinstalling blinds is just the removal process done backwards: brackets go up first, then the headrail, then a quick mechanism check. If you keep everything organised, it only takes a few minutes.
Before you start, make sure you’ve got your blind parts labelled and organised, screws in one spot, brackets grouped, small clips kept safe. This alone saves most of the time people lose during DIY installation.
Start by locating the mounting brackets and checking they’re secure on the wall or frame. Screw them back into the same holes if you removed them earlier, so everything lines up properly. Then lift the headrail into position and make sure it clicks or locks in evenly on both sides.
From there, just reverse the removal steps, reconnect any chains, pins, or safety latches, then test raise and lower the blind to check it’s moving smoothly.
No instructions handy? A quick installation guide for your blind type covers the basics, but most roller and Venetian blinds follow the same order: brackets, then headrail, then mechanism check.
If reinstalling isn’t how you want to spend your afternoon, Clean Nation can reinstall roller blinds and other styles for you, so everything goes back up straight and works properly.
Why Choose Clean Nation to Remove Window Blinds for Cleaning?
Clean Nation offers professional window cleaning services and blind removal services so you don’t have to deal with ladders, brackets, or guesswork. Just book us in, and we handle the rest.
Not sure when to call a professional for blind removal? High windows, motorised blinds, jammed mechanisms, or simply not having the time are all good reasons to skip the DIY route.
Our window furnishing technicians know every blind type, roller, Venetian, vertical, and motorised, so nothing gets forced or guessed at. From removal to professional blind installation, our window cleaning services cover the whole job.
It’s a genuinely cost-effective home maintenance choice too. Hiring roller blind installers means no stripped screws or cracked walls to fix later.
If you’re bundling blind removal with a full window clean, it’s worth knowing what the overall job might cost. How Much Does Window Cleaning Cost? breaks down typical pricing so you know what to expect.”
Ready to go? Book a blind removal service with Clean Nation and leave the rest to us.
Client Experience With Clean Nation
Sarah from Brunswick had six roller blinds overdue for cleaning and no time to remove them herself. Clean Nation got the job done safely in one visit.
Her roller blinds hadn’t come down in three years, and a couple of brackets had started sticking. She’d tried one herself but stopped halfway, worried about damaging the wall.
Our team had all six down in twenty minutes, using careful removal the whole way through. Each blind was properly cleaned of dust, grime, and some mould on the bathroom blind before going back up. Brackets were checked and tightened during reinstallation too, so the sticking issue got sorted along the way.
No wall damage, no stripped screws, and blinds that looked and worked better than before. That’s the kind of customer satisfaction we aim for on every job.
Overdue for the same treatment? Book a visit with Clean Nation.
FAQs
The following are the FAQs:
How often should you remove blinds for cleaning?
Most blinds only need a deep clean and full removal once or twice a year, depending on the room. Kitchens and bathrooms tend to collect grease and moisture faster, so those blinds may need it more often than bedroom or living room blinds.
Can you clean blinds without taking them down?
You can do a light dusting or wipe-over while blinds are still hanging, but it won’t get them properly clean. Dust and grime build up in the folds, tracks, and brackets that you simply can’t reach without removing the blind fully.
How to remove roller blinds with hidden brackets?
Hidden brackets are usually tucked inside the headrail or covered with a small plastic cap that clips off. Gently pop the cover open, locate the bracket underneath, then release it the same way as a standard chain or pin-side bracket.
How to remove window blinds for cleaning without screws?
Most modern blinds use clip-in or slot-type brackets that don’t need any screws at all, just a firm, gentle pull to release. Check your bracket type first; if it’s a hook or slot style, the blind should lift straight out without any tools.
What are common blind problems?
The most common issues are jammed mechanisms, stuck chains, sagging cords, and brackets that loosen over time. Regular cleaning and careful removal, rather than forcing anything, usually stop these problems before they start.
Conclusion
Removing blinds isn’t complicated once you know your bracket type and take it step by step, but it still takes patience, the right tools, and a steady hand to avoid stripped screws or bent brackets along the way. Whether you’re cleaning, repainting, or switching to new blinds altogether, getting them down and back up properly keeps your windows, walls, and blinds in good shape for years to come. If you’d rather leave it to the professionals, contact us today, and we’ll take care of the rest.