

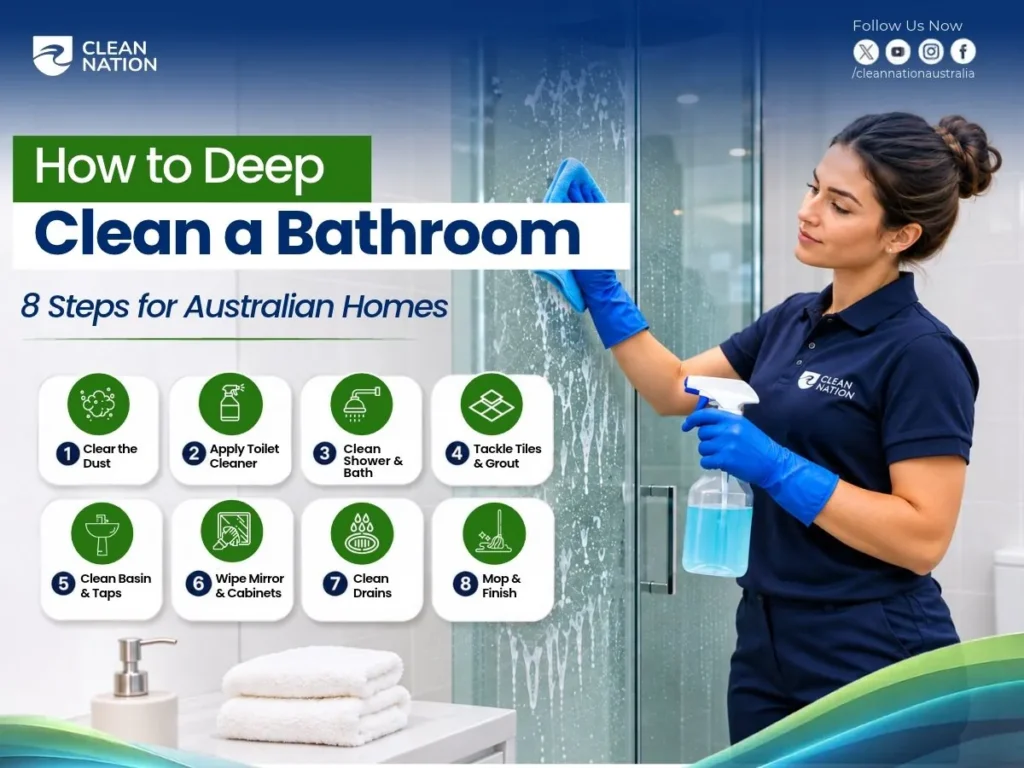
To deep clean a bathroom, clear the room, remove dust, apply toilet cleaner and work from the shower down to the floor. Clean the tiles, grout, glass, basin, taps and drains using products suited to each surface. Finish by cleaning the toilet, mopping the floor and drying the room. Never mix bleach with vinegar, ammonia or other cleaners.
This guide explains how to deep clean a bathroom step by step, deal with stubborn grime and mould, and keep your bathroom cleaner in Australian conditions.
What Does a Bathroom Deep Clean Include?
A bathroom deep clean removes dirt and build-up that a normal weekly clean may leave behind.
Regular cleaning covers basic tasks such as wiping the basin, cleaning the toilet and mopping the floor.
Deep cleaning gives extra attention to soap scum, grout lines, tap fittings, shower edges and areas that are easy to miss.
| Bathroom Area | What a Deep Clean Covers |
| Shower and bath | Soap scum, water marks and accessible corners |
| Shower glass | Removable spots and residue using a coating-safe method |
| Tiles and grout | Dirt trapped in grout lines and textured surfaces |
| Toilet | Bowl, rim, seat, hinges, cistern and exterior |
| Basin and taps | Soap residue, toothpaste marks and suitable mineral deposits |
| Mirrors and cupboards | Fingerprints, dust and accessible shelf surfaces |
| Drain covers | Visible hair and soap build-up |
| Floor | Tile joints, corners and edges around fixtures |
A deep clean can improve the appearance of dirty surfaces, but it cannot repair cracked tiles, failed silicone seals or permanent glass damage.
What Do You Need Before You Start?
Gather your cleaning tools before applying any products. This makes it easier to work through the bathroom without repeatedly stopping.
Essential Bathroom Cleaning Tools
- Rubber gloves and suitable eye protection.
- Soft microfibre cloths and non-scratch sponges.
- A small soft brush for grout and corners.
- Toilet brush and separate toilet-cleaning cloth.
- Squeegee for suitable shower glass.
- Mop, bucket and dusting cloth.
- Rubbish bag and clean towels.
Keep separate tools for the toilet and other bathroom surfaces to reduce the risk of spreading contamination.
Which Cleaning Products Should You Use?
For most bathroom surfaces, start with a mild, suitable cleaning product.
A bathroom cleaner may help remove soap residue, while a separate toilet cleaner is designed for the toilet bowl.
Mineral deposits may need a suitable descaler, but acidic products are not safe for every material.
Check the care instructions for acrylic baths, natural stone, coated glass, metal finishes and sealed surfaces.
Always test a suitable cleaner in a small, less visible area before using it across the entire surface.
Bathroom Cleaning Chemicals You Must Never Mix
Never mix bleach with vinegar, ammonia, acidic toilet cleaners or other cleaning products.
Dangerous fumes can form when incompatible chemicals are combined.
Some glass cleaners contain ammonia, while certain toilet cleaners contain acids.
Read product labels, use one product at a time and follow the recommended dilution and contact time.
Keep windows open where possible and use suitable ventilation.
If you suspect chemical poisoning, call the Australian Poisons Information Centre on 13 11 26. For a life-threatening emergency, call 000.
How to Deep Clean a Bathroom Step by Step
The most efficient cleaning order is generally top to bottom, cleaner areas before dirtier areas, and the floor last.
Follow these eight steps for a complete bathroom clean.
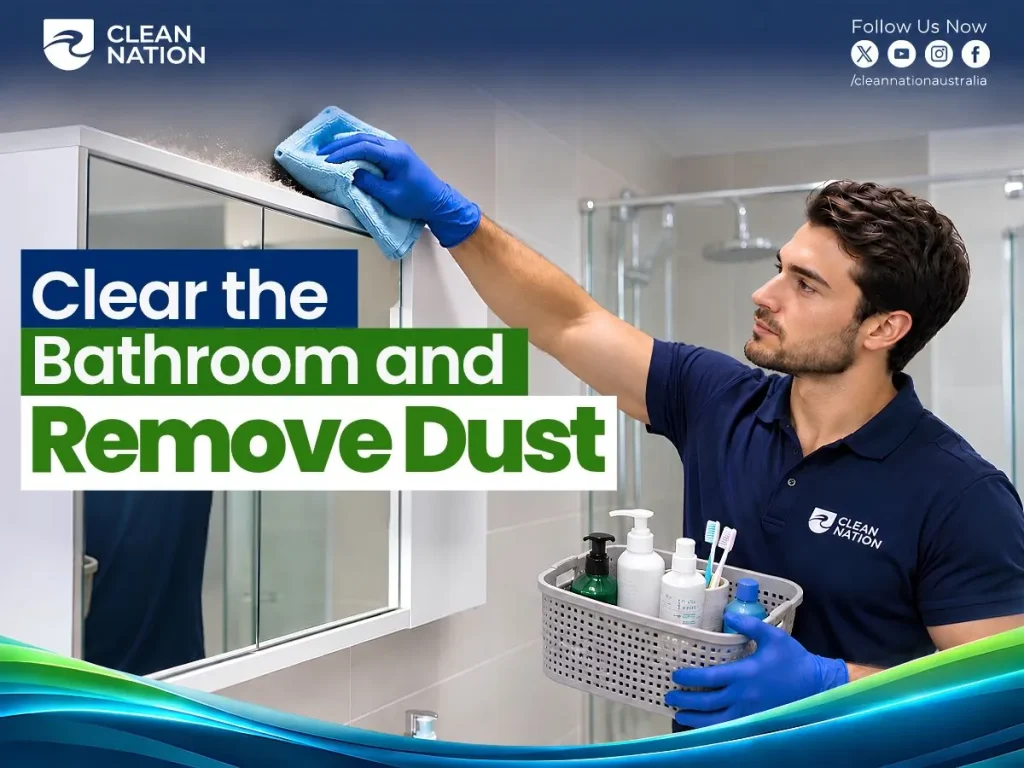
Step 1: Clear the Bathroom and Remove Dust
Start by removing shampoo bottles, toothbrush holders, bath mats, towels and other loose items.
Empty the bathroom bin and dispose of rubbish.
Check products for leaks or expired contents before putting them back later.
Use a dry microfibre cloth or suitable duster to remove cobwebs and loose dust from accessible high surfaces.
Pay attention to:
- Corners and window ledges.
- Cabinet tops.
- Door frames and skirting boards.
- Accessible extractor fan covers.
- Shelves and light switch surrounds.
Do not spray water or cleaning products into electrical fittings or ventilation systems.
If an exhaust fan cover needs removing, follow the manufacturer’s instructions and isolate the power where required.
Removing dry dust first prevents it from turning into dirty streaks when you start wet cleaning.
Step 2: Apply Toilet Cleaner and Allow It to Work
Apply a suitable toilet-bowl cleaner under the rim and around the inside of the bowl.
Follow the product label for the correct contact time.
Do not assume every cleaner needs the same amount of time.
While the product works, continue cleaning the other bathroom areas.
Keep toilet-cleaning tools separate from the cloths used on the basin, taps and mirrors.
If you are using a bleach-based toilet cleaner, avoid using incompatible products elsewhere that could come into contact with it.
You will return to the toilet after cleaning the less contaminated bathroom surfaces.
Step 3: Deep Clean the Shower, Bath and Glass
The shower is often the most time-consuming area because soap scum, body oils and mineral deposits collect on several surfaces.
Start with the shower walls and bath, using a cleaner suitable for the material.
Apply the product according to its instructions and allow the recommended contact time.
Gently scrub removable dirt with a non-scratch sponge.
Pay attention to soap holders, accessible corners and areas around the tap fittings.
Rinse away the residue thoroughly.
For acrylic baths, avoid abrasive scourers that may scratch the finish.
Cleaning shower glass: Use mild detergent and a soft microfibre cloth on compatible glass. Rinse and dry with a squeegee.
If the shower screen has a protective coating, check the manufacturer’s instructions before applying vinegar or a descaler.
Our separate guide on how to clean shower glass explains how to deal with soap scum and water marks without damaging sensitive finishes.
Step 4: Scrub Bathroom Tiles and Grout
Bathroom tiles are exposed to moisture, soap and everyday dirt.
Grout lines can hold residue that a quick wipe does not remove.
Begin by checking the tile material.
Ceramic and porcelain tiles can handle different cleaning products than natural stone, such as marble, limestone, or travertine.
Apply a suitable tile cleaner and allow it to work for the recommended time.
Then use a soft grout brush to clean accessible joints.
Focus on shower corners, tile edges and areas where grime has collected.
Rinse thoroughly to prevent dirty water or cleaning residue from settling back into the grout.
Do not use acidic descalers on natural stone unless the manufacturer specifically approves them.
If the grout is cracked, missing or permanently stained, more scrubbing may not help.
For heavier build-up, professional tile and grout cleaning services may help remove suitable dirt from tiled surfaces.
Step 5: Check for Mould Around Silicone and Seals
Black marks around shower silicone can be caused by surface staining or mould growth.
If the affected area is small and suitable for home cleaning, use an approved product and follow its safety instructions.
Avoid dry brushing suspected mould, which can spread particles into the air.
Wear suitable protection and keep the bathroom ventilated.
Some mould cleaners contain bleach, while other methods use different active ingredients. Never combine treatments.
A key limitation is that mould can grow into silicone or damaged grout.
Even if the surface looks cleaner, the deeper material may remain affected.
When silicone is heavily blackened, cracked, or lifting away, you may need to replace it rather than clean it.
Large or recurring mould problems can indicate a moisture or ventilation fault that needs professional attention.
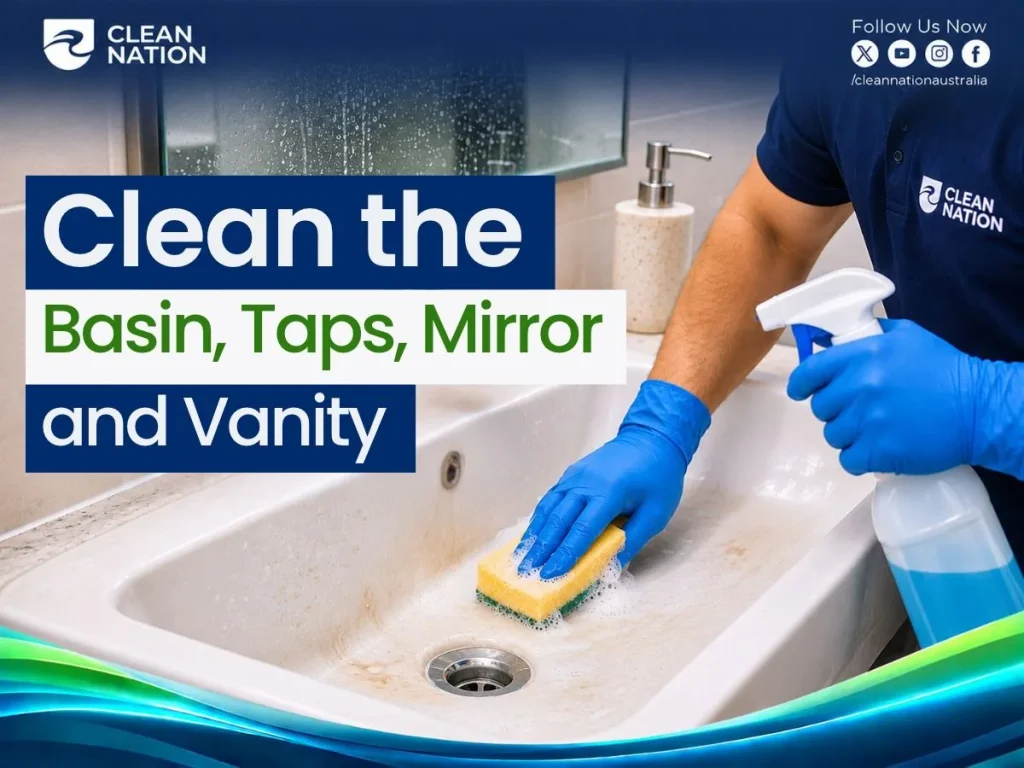
Step 6: Clean the Basin, Taps, Mirror and Vanity
Next, move to the basin and vanity.
Remove items from the benchtop and wipe away loose dust.
Apply a suitable cleaner to the basin and gently remove toothpaste marks, soap residue and everyday grime.
Use a soft cloth around taps and fittings.
Pay attention to the area behind the taps and around the basin edge, where residue often collects.
If white mineral marks remain, check whether the tap finish allows a suitable descaler.
Avoid acidic products on natural stone benchtops or sensitive metal finishes.
For mirrors, use a suitable glass cleaner or a lightly dampened microfibre cloth.
Wipe with a separate dry cloth to remove streaks.
Clean accessible cupboard fronts, drawer handles and shelves where needed.
Keep moisture away from electrical outlets and materials that may swell when wet.
Step 7: Remove Visible Hair and Clean Drain Covers
Shower and basin drains collect hair, soap residue and other debris.
Routine bathroom deep cleaning should include accessible drain covers and surrounding surfaces.
Put on gloves and check whether the cover can be removed safely.
Some covers lift out, while others are fixed or require a special tool.
Remove visible hair without pushing it deeper into the pipe.
Use a soft brush and mild detergent to clean removable covers and accessible edges.
Rinse the parts and refit them correctly.
If water drains slowly, a deeper blockage may be present.
Our guide on how to clean a shower drain explains hair removal, drain odours and when to contact a plumber.
Do not force metal tools into the pipe or use strong drain chemicals as part of routine bathroom cleaning.
Step 8: Finish the Toilet and Mop the Floor
Return to the toilet after the cleaner has had its recommended contact time.
Scrub the inside of the bowl with a toilet brush and flush as directed.
Clean the exterior using separate toilet-only cloths.
Include the seat, lid, hinges, flush button, cistern and accessible base.
Follow the product label if disinfection is required, including its specified contact time.
Keep toilet tools away from the basin and other surfaces.
Clean the floor last.
Remove remaining hair and loose dirt before mopping.
Use a floor cleaner suitable for the tile material and work from the far side of the bathroom towards the doorway.
Pay attention to floor edges and areas around the toilet base.
Rinse if required and allow the floor to dry before replacing the bath mats.
Finally, put away cleaning products, wash reusable tools and wash your hands.
Why Do Australian Bathrooms Develop Mould?
Mould grows where moisture remains for long periods.
Bathrooms are especially vulnerable because showers create steam and condensation.
Poor ventilation, leaking pipes and wet surfaces can make the problem worse.
In humid parts of Australia, including many coastal areas, bathrooms may take longer to dry.
However, mould is not limited to tropical or coastal climates. It can also develop in poorly ventilated homes in Melbourne, Sydney and other cities.
To reduce the risk:
- Run the exhaust fan during and after showers.
- Open a window when suitable.
- Wipe away condensation from glass and tiles.
- Hang wet towels and bath mats to dry.
- Repair leaking taps and damaged seals promptly.
- Check that the exhaust fan is working properly.
NSW Health advises using exhaust fans during and after showers to help remove moisture.
If mould keeps returning after cleaning, investigate the source instead of repeatedly applying stronger products.

Does Hard Water Change How You Clean a Bathroom?
Yes. Water hardness affects how quickly mineral deposits can collect on taps, shower screens and other bathroom fittings.
Hardness is mainly related to the amount of calcium and magnesium in the water.
When water evaporates, these minerals can leave white marks or limescale.
Water quality varies across Australia, sometimes even between suburbs in the same city.
| Australian City | Water Hardness Considerations | Cleaning Advice |
| Melbourne | Generally soft water; Melbourne Water reports approximately 9–38 mg/L across tested supplies | Focus on soap residue and dry glass after showering |
| Adelaide | Mineral content varies with the supply and water source | Watch for chalky deposits and check local SA Water information |
| Perth | Hardness varies widely depending on the supply area and groundwater contribution | Dry wet surfaces and use an approved descaler when needed |
The figures are general supplier information, not a guaranteed measurement for every home.
Australian drinking-water guidance notes that water hardness above 200 mg/L can increase scale problems.
How should you clean limescale?
First identify the affected surface.
A descaler may be suitable for some ceramic tiles or tap finishes, but acidic products can damage marble, limestone, grout and certain metal coatings.
Always follow the surface manufacturer’s instructions.
For shower screens, removing water after each use can help reduce new mineral spots.
How Often Should You Deep Clean a Bathroom?
Most bathrooms benefit from regular weekly cleaning and occasional more detailed work.
A practical deep-cleaning schedule depends on how many people use the bathroom and how quickly residue builds up.
| Cleaning Task | Suggested Frequency |
| Wipe basin and taps | Several times a week or as needed |
| Clean toilet and frequently touched surfaces | At least weekly; more often with heavy use |
| Clean shower and bathroom floor | Weekly or as needed |
| Deep clean grout, corners and detailed areas | Around monthly, depending on condition |
| Check silicone, drainage and ventilation | During monthly maintenance and whenever problems appear |
These are suggested household routines, not fixed Australian legal requirements.
A family bathroom used several times a day may need more attention than an occasional guest bathroom.
If you notice mould, heavy scale or recurring odours, investigate the cause instead of waiting for the next scheduled deep clean.
How Much Does a Professional Bathroom Deep Clean Cost in Australia?
Professional bathroom deep cleaning costs depend on the size of the bathroom, the condition of the surfaces and the amount of work required.
Heavy limescale, detailed grout cleaning and multiple bathrooms can increase the time needed.
Published Australian price guides provide the following indications.
| Service / Pricing Source | Indicative Cost |
| Bathroom-only deep clean in Queensland The Quote Yard guide | 140–320 per bathroom |
| Clean Nation deep cleaning in Melbourne | From $70 per hour |
| Clean Nation regular cleaning in Melbourne, for comparison | From $57 per hour |
These are different types of prices. A bathroom-only quote should not be compared directly with an hourly rate for a wider home-cleaning service.
Clean Nation’s Melbourne rates are starting prices, not fixed bathroom-only quotes. Confirm whether GST, minimum booking times and additional work are included.
A professional quote should explain whether the service covers shower glass, grout, tapware, the toilet, floors and accessible vents.
Some tasks, including replacing silicone, repairing plumbing and specialist mould remediation, may require separate services.
For regular and one-off home cleaning, explore Clean Nation’s house cleaning services in Australia.
Common Bathroom Deep Cleaning Mistakes
Even a detailed bathroom clean can leave poor results if the method is wrong.
| Mistake | Better Approach |
| Wiping cleaner off immediately | Follow the product’s recommended contact time |
| Mixing bleach with vinegar or glass cleaner | Use one compatible product at a time |
| Using rough scourers on glass or acrylic | Choose soft, non-scratch tools |
| Mopping the floor before cleaning other surfaces | Leave the floor until last |
| Using strong descaler on natural stone | Choose a product approved for the material |
| Leaving the bathroom wet after cleaning | Dry surfaces and improve ventilation |
| Scrubbing damaged silicone repeatedly | Check whether the seal needs replacing |
A strong chemical is not always the best answer to stubborn dirt.
Correct surface identification, suitable cleaning products and enough contact time are usually more useful than aggressive scrubbing.

Deep Cleaning a Bathroom Before a Rental Inspection
Rental bathrooms often receive close attention during an end-of-lease inspection.
Visible soap scum, dirty grout, toilet residue and water marks may need cleaning before the property is handed back.
Start by comparing the bathroom’s current condition with the entry condition report and any dated photographs.
Clean removable dirt from the shower, basin, toilet, accessible drain covers and floors.
Check mirrors, cupboard surfaces and fittings for visible residue.
However, cleaning and repairs are different.
Cracked tiles, damaged seals, failed waterproofing and plumbing faults cannot be fixed by deep cleaning.
Normal wear and tear should also be considered according to the applicable tenancy rules.
If you are planning a full rental clean, read our guide to end-of-lease cleaning costs in Australia to understand common pricing and quote inclusions.
When Should You Book Professional Bathroom Deep Cleaning?
A thorough DIY clean is suitable for many everyday bathroom problems.
However, professional cleaning may help when:
- Soap scum remains after suitable home cleaning.
- Dirt is trapped in textured tiles or grout lines.
- Several bathrooms need detailed cleaning.
- The property needs a one-off spring clean.
- You are preparing a rental property for handover.
Professional cleaners can assess suitable surfaces and recommend an appropriate cleaning scope.
However, cleaning cannot replace broken fittings, repair damaged grout or solve hidden moisture problems.
For extensive mould, leaking plumbing or damaged waterproofing, a qualified specialist may be needed.
Frequently Asked Questions
1. Can I Use the Same Cloth for the Toilet and Sink?
No. Use separate cleaning cloths for toilet surfaces and the sink. Colour-coded cloths can help prevent mix-ups. Wash reusable cloths properly after cleaning and replace disposable materials as directed.
2. How Long Does a Bathroom Deep Clean Take?
A bathroom deep clean may take around one to three hours, depending on its size and condition. Heavy limescale, dirty grout and neglected areas can take longer. A cleaning company can provide a better estimate after seeing the bathroom.
3. Should I Deep Clean Before or After a Rental Inspection?
Complete the main clean before the final inspection, ideally after your belongings have been removed. Allow time for the bathroom to dry and check for missed areas. If the agent later identifies a valid cleaning issue, assess whether further cleaning is required.
4. Is It Safe to Clean Bathroom Mould if Someone Has Asthma?
Mould can worsen asthma and respiratory symptoms. People with asthma or other breathing conditions should avoid exposure during mould removal. Seek professional advice for extensive mould and consult a healthcare professional about continuing symptoms.
5. What Should I Do if the Shower Silicone Is Cracked or Black?
Clean removable surface dirt gently, but do not keep scrubbing damaged silicone. Cracked, loose or deeply mould-affected sealant may need replacement. Arrange a suitable repair professional if the seal is failing or water may be entering the surrounding structure.
Keep Your Bathroom Cleaner Between Deep Cleans
A bathroom is easier to maintain when moisture and everyday grime are dealt with regularly.
Use a squeegee after showering, wipe away fresh spills, clean frequently used surfaces and keep the exhaust fan working.
Set aside time for detailed cleaning when grout, corners and fixtures start collecting build-up.
If your bathroom needs more attention than a routine clean, Clean Nation can discuss a suitable one-off or regular service.
Call +61480810142 or contact Clean Nation to request a tailored cleaning quote.